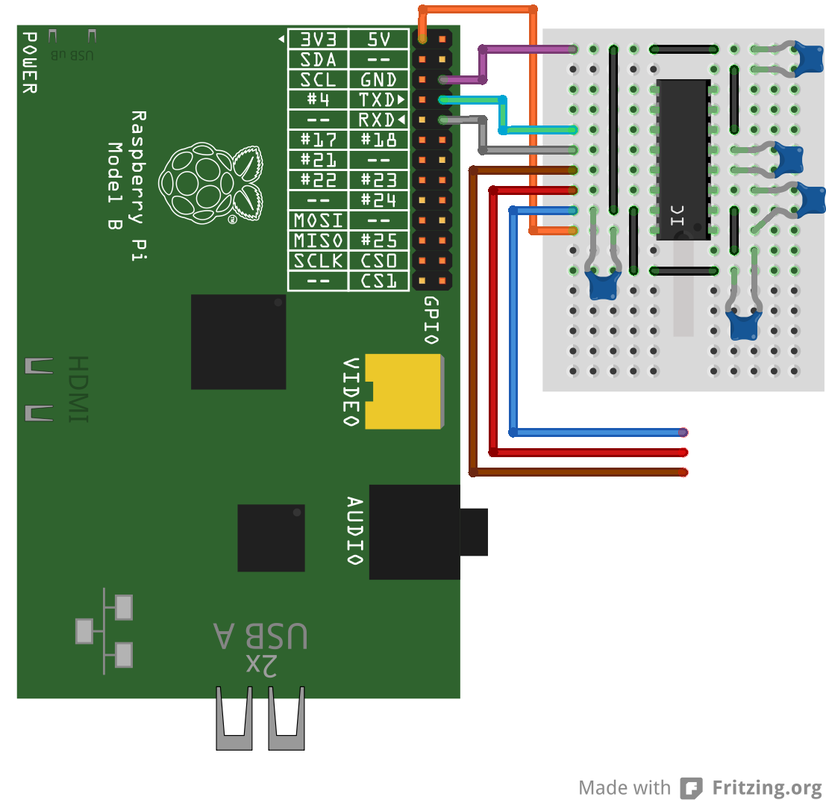
UART to RS-232 converter
On GPIO header of RPi you can find a so called UART pins. In fact, it is normal serial port you know from computers with only one change. UART uses 0 Volts for logical 0 and 3,3 Volts for logical 1 while regular RS-232 uses -10V for 1 and +10V for 0. This difference means that when you connect RS-232 device directly to UART pins, RPi will surely not survive. For this reason, MAX3232CPE integrated circuit was developed. It is a simple converter that converts voltage levels with help of few capacitors. To build this, you will need:
- MAX3232CPE
- 5x 100nF capacitors (ceramic)
UART to RS-232 converter
Note that I placed MAX3232CPE upside down (pin 1 is down on right side)! Now you can connect to RPi via RS-232 interface - blue (GND), red (RXD) and brown (TXD) cable. RS-232 uses DB-9 connector, connect it this way:
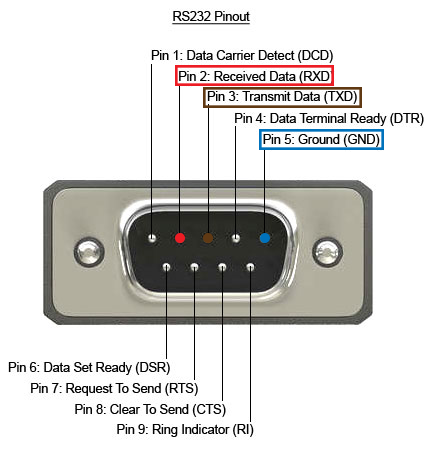
DB-9 connector pins
Connecting to serial console
In default configuration is Raspbian set to use this port as classic console port (boot messages at startup, debug, you can login and send commands...). To achieve this, connect RPi to computer serial port like you can see above. To communicate with RPi, download Putty (here). Run Putty and set it to "Serial". On left-side click again on "Serial" and set baud to 115200, data bits to 8, stop bits to 1 and disable parity and flow control.
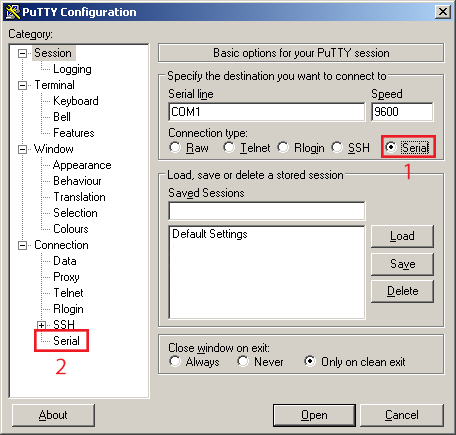
Configuring Putty to communicate via RS-232
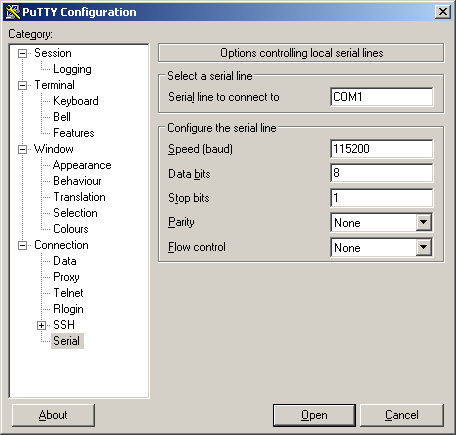
Configuring Putty to communicate via RS-232 (2)
Click "Open" and turn on RPi. You should now see boot messages and after a minute also a login prompt. But UART can also be configured to communicate with other peripherals (devices such as GPS modules, GSM modems...). To achieve this, follow this guide (will be added later).