Internet gateway (GPRS/EDGE/3G/HSPA)
This guide will show you how to connect RPi to Internet via GPRS/EDGE/3G/HSPA technologies. At first you have to connect RPi to mobile network with GPRS/EDGE/3G/HSPA modem. This can be done in multiple ways...
- phone connected via USB (every Nokia or my Android worked fine so far)
- HSPA/3G USB module
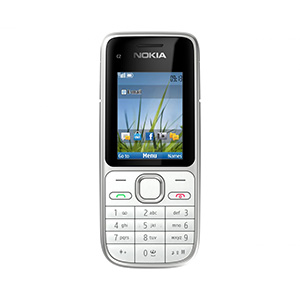
Nokia C2-01
I will start with connection via mobile phone (it is a bit easier to get it working). Firstly connect phone to RPi with USB cable. In default configuration, on Nokia screen will pop-up a question about which mode to use. Select "PC Suite" option. Issue lsusb command to see if phone was recognized.
root@server:~# lsusb
Bus 001 Device 002: ID 0424:9512 Standard Microsystems Corp.
Bus 001 Device 001: ID 1d6b:0002 Linux Foundation 2.0 root hub
Bus 001 Device 003: ID 0424:ec00 Standard Microsystems Corp.
Bus 001 Device 004: ID 0421:054b Nokia Mobile Phones
Nokia in "PC Suite" mode should create a new "ttyACMx" device in /dev folder.
root@server:~# l /dev/ttyACM*
crw-rw---T 1 root dialout 166, 0 Sep 14 23:54 /dev/ttyACM0
Now we should be able to communicate directly with baseband chip of the phone through virtual serial interface "ttyACM0". To send commands to serial interface, install Minicom.
apt-get install minicom
Start and configure Minicom to /dev/ttyACMx device, 115200 8N1, enable software and hardware flow control.
minicom -s
You can test communication sending "AT" command. Nokia should respond with "OK".
Welcome to minicom 2.6.1
OPTIONS: I18n
Compiled on Apr 28 2012, 19:24:31.
Port /dev/ttyACM0
Press CTRL-A Z for help on special keys
AT
OK
Now exit Minicom with CTRL+A then X then Enter. Now we have to install program that will tell baseband chip of phone to start a data call. For this purpose you can use wvdial. Package ppp is also needed.
apt-get install wvdial ppp
Edit wvdial configuration file.
nano /etc/wvdial.conf
And insert this...
[Dialer Defaults]
Init1 = ATZ
Init2 = ATQ0 V1 E1 S0=0 &C1 &D2 +FCLASS=0
Modem Type = USB Modem
ISDN = 0
New PPPD = yes
Modem = /dev/ttyACM0
Phone = PHONE-NUMBER
Username = USERNAME
Password = PASSWORD
Baud = 460800
Change statements in black bold. If you don`t know right values, ask you service provider. Phone number is almost everywhere *99#. Some service providers don`t use username and password but wvdial will not allow you to let these statements empty. So you will have to use a little workaround - add "Stupid Mode = 1" statement and set username and password to any value (for example test test). Now save and quit (CTRL+X then Y and Enter). Now you can start wvdial and it should connect RPi to Internet.
root@server:~# wvdial
--> WvDial: Internet dialer version 1.61
--> Initializing modem.
--> Sending: ATZ
ATZ
OK
--> Sending: ATQ0 V1 E1 S0=0 &C1 &D2 +FCLASS=0
ATQ0 V1 E1 S0=0 &C1 &D2 +FCLASS=0
OK
--> Modem initialized.
--> Sending: ATDT*99#
--> Waiting for carrier.
ATDT*99#
CONNECT
--> Carrier detected. Waiting for prompt.
--> PPP negotiation detected.
--> Starting pppd at Sun Sep 15 00:44:00 2013
--> Pid of pppd: 8994
--> Using interface ppp0
--> local IP address 10.11.xx.xx
--> remote IP address 10.6.xx.xx
--> primary DNS address 10.168.xx.xx
--> secondary DNS address 10.168.xx.xx
And now you are connected. Open another terminal window and try to ping something:
root@server:~# ping -c5 google.com
PING google.com (62.168.125.25) 56(84) bytes of data.
64 bytes from 62.168.125.25: icmp_req=1 ttl=58 time=42.6 ms
64 bytes from 62.168.125.25: icmp_req=2 ttl=58 time=40.6 ms
64 bytes from 62.168.125.25: icmp_req=3 ttl=58 time=39.5 ms
64 bytes from 62.168.125.25: icmp_req=4 ttl=58 time=40.6 ms
64 bytes from 62.168.125.25: icmp_req=5 ttl=58 time=41.3 ms
--- google.com ping statistics ---
5 packets transmitted, 5 received, 0% packet loss, time 6002ms
rtt min/avg/max/mdev = 39.512/40.961/42.646/1.058 ms
To end connection, return to wvdial terminal and press CTRL+C.
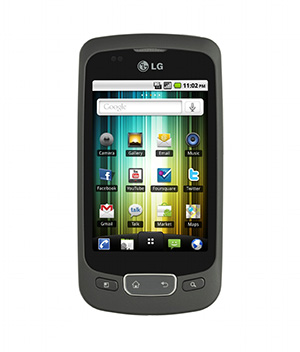
Android (LG P500 Optimus One)
Android devices cannot be connected in the previous way, because Android don`t let you directly communicate with its baseband chip. But as a compensation, at least offers USB tethering. It is very simple to use, connect Android to RPi with USB cable. Then go to settings in Android > Tethering and portable hotspot > check USB tethering (don`t know from which version this option is available, mine is 4.0.4). Now issue lsusb to see if android is recognized.
root@server:~# lsusb
Bus 001 Device 002: ID 0424:9512 Standard Microsystems Corp.
Bus 001 Device 001: ID 1d6b:0002 Linux Foundation 2.0 root hub
Bus 001 Device 003: ID 0424:ec00 Standard Microsystems Corp.
Bus 001 Device 007: ID 1004:61da LG Electronics, Inc.
Now run ifconfig, there should be a new interface.
root@server:~# ifconfig
lo Link encap:Local Loopback
inet addr:127.0.0.1 Mask:255.0.0.0
inet6 addr: ::1/128 Scope:Host
UP LOOPBACK RUNNING MTU:16436 Metric:1
RX packets:4266 errors:0 dropped:0 overruns:0 frame:0
TX packets:4266 errors:0 dropped:0 overruns:0 carrier:0
collisions:0 txqueuelen:0
RX bytes:734807 (717.5 KiB) TX bytes:734807 (717.5 KiB)
usb0 Link encap:Ethernet HWaddr xx:xx:xx:xx:xx:xx
inet6 addr: fe80::xxxx:xxff:fexx:xxxx/64 Scope:Link
UP BROADCAST RUNNING MULTICAST MTU:1500 Metric:1
RX packets:6 errors:0 dropped:0 overruns:0 frame:0
TX packets:26 errors:0 dropped:0 overruns:0 carrier:0
collisions:0 txqueuelen:1000
RX bytes:384 (384.0 B) TX bytes:5686 (5.5 KiB)
It is in place, last step, request IP address for usb0 interface:
root@server:~# dhclient usb0 -v
Internet Systems Consortium DHCP Client 4.2.2
Copyright 2004-2011 Internet Systems Consortium.
All rights reserved.
For info, please visit https://www.isc.org/software/dhcp/
Listening on LPF/usb0/xx:xx:xx:xx:xx:xx
Sending on LPF/usb0/xx:xx:xx:xx:xx:xx
Sending on Socket/fallback
DHCPDISCOVER on usb0 to 255.255.255.255 port 67 interval 8
DHCPREQUEST on usb0 to 255.255.255.255 port 67
DHCPOFFER from 192.168.42.xx
DHCPACK from 192.168.42.xx
Reloading /etc/samba/smb.conf: smbd only.
bound to 192.168.42.xx -- renewal in 1455 seconds.
Reissue ifconfig to see address is in place...
root@server:~# ifconfig
lo Link encap:Local Loopback
inet addr:127.0.0.1 Mask:255.0.0.0
inet6 addr: ::1/128 Scope:Host
UP LOOPBACK RUNNING MTU:16436 Metric:1
RX packets:4276 errors:0 dropped:0 overruns:0 frame:0
TX packets:4276 errors:0 dropped:0 overruns:0 carrier:0
collisions:0 txqueuelen:0
RX bytes:736285 (719.0 KiB) TX bytes:736285 (719.0 KiB)
usb0 Link encap:Ethernet HWaddr xx:xx:xx:xx:xx:xx
inet addr:192.168.42.xx Bcast:192.168.42.255 Mask:255.255.255.0
inet6 addr: fe80::xxxx:xxff:fexx:xxxx/64 Scope:Link
UP BROADCAST RUNNING MULTICAST MTU:1500 Metric:1
RX packets:14 errors:0 dropped:0 overruns:0 frame:0
TX packets:45 errors:0 dropped:0 overruns:0 carrier:0
collisions:0 txqueuelen:1000
RX bytes:1200 (1.1 KiB) TX bytes:10911 (10.6 KiB)
...so ping should be successful:
root@server:~# ping -c5 google.com
PING google.com (62.168.125.29) 56(84) bytes of data.
64 bytes from 62.168.125.29: icmp_req=1 ttl=58 time=42.8 ms
64 bytes from 62.168.125.29: icmp_req=2 ttl=58 time=40.9 ms
64 bytes from 62.168.125.29: icmp_req=3 ttl=58 time=40.6 ms
64 bytes from 62.168.125.29: icmp_req=4 ttl=58 time=40.9 ms
64 bytes from 62.168.125.29: icmp_req=5 ttl=58 time=41.0 ms
--- google.com ping statistics ---
5 packets transmitted, 5 received, 0% packet loss, time 6004ms
rtt min/avg/max/mdev = 40.657/41.303/42.833/0.819 ms
To disconnect, simply unplug the USB cable (or uncheck "USB tethering" option in Android settings).
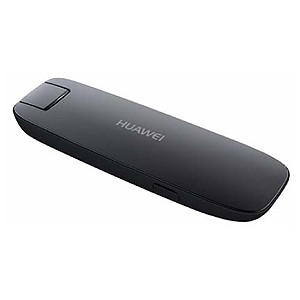
USB module (Huawei E367 HSPA+)
These USB modules has two disadvantages. First, it doesn`t have battery like mobile phone, so all power is taken from USB. Power consumption is about 700mA at the connecting which causes short voltage drop leading to restart of RPi. But after restart all works fine for me. This problem can also be solved by connecting to powered USB hub which costs about 10€. The second disadvantage is that most of them are in mass storage mode by default. That means the device appears as a simple USB flash (mostly containing drivers for Windows) and nothing more. So you have to switch dongle from mass storage mode to modem. To do this, install usb-modeswitch package.
apt-get install usb-modeswitch
Before configuring modeswitch you have to find out dongle`s vendor and product IDs. This can be easily found issuing lsusb after connecting it.
root@server:~# lsusb
Bus 001 Device 002: ID 0424:9512 Standard Microsystems Corp.
Bus 001 Device 001: ID 1d6b:0002 Linux Foundation 2.0 root hub
Bus 001 Device 003: ID 0424:ec00 Standard Microsystems Corp.
Bus 001 Device 005: ID 12d1:1506 Huawei Technologies Co., Ltd. E398 LTE/UMTS/GSM Modem/Networkcard
These two IDs are in fornat "vendorID:productID". We will need them later. Now open usb-modeswitch configuration package.
nano /etc/usb_modeswitch.conf
And append following lines...
########################################################
# Huawei E367
EnableLogging=1
DefaultVendor= 0x12d1
DefaultProduct=0x1506
TargetVendor= 0x12d1
TargetProductList="1001,1406,140b,140c,1412,141b,14ac,1506"
CheckSuccess=20
MessageEndpoint= 0x01
MessageContent="55534243123456780000000000000011062000000100000000000000000000"
##############################################################
Do not forget to change vendor and product IDs according to yours! Close file (CTRL+X...) and save changes (...press "y" and Enter). Now is a good idea to restart RPi because this changes are made to kernel modules. If you do not want to restart, reload module usbserial (rmmod usbserial), but it may have some dependent modules which you have to reload too, this is why I see restart a better option. After restart (or removing usbserial module) try to modeswitch dongle to modem mode. Issue:
usb_modeswitch -c /etc/usb_modeswitch.conf
And this is the critical step... Modeswitch will try to switch modes and check if switch was succesful. In my case, switch was always succesful but check always fails.
Looking for target devices ...
Found devices in target mode or class (1)
Looking for default devices ...
found matching product ID
adding device
Found device in default mode, class or configuration (1)
Accessing device 005 on bus 001 ...
Getting the current device configuration ...
OK, got current device configuration (1)
Using first interface: 0x00
Using endpoints 0x01 (out) and 0x82 (in)
Not a storage device, skipping SCSI inquiry
USB description data (for identification)
-------------------------
Manufacturer: Huawei Technologies
Product: HUAWEI Mobile
Serial No.: not provided
-------------------------
Looking for active driver ...
No driver found. Either detached before or never attached
Setting up communication with interface 0
Using endpoint 0x01 for message sending ...
Trying to send message 1 to endpoint 0x01 ...
OK, message successfully sent
Resetting response endpoint 0x82
Resetting message endpoint 0x01
Checking for mode switch (max. 20 times, once per second) ...
Searching for target devices ...
...
Searching for target devices ...
No new devices in target mode or class found
Mode switch has failed. Bye.
Ignore error on the end and try to run ifconfig command. You should see a new wwan0 interface, proof that modeswitch was successful.
root@server:~# ifconfig
eth0 Link encap:Ethernet HWaddr xx:xx:xx:xx:xx:xx
inet addr:10.0.xx.xx Bcast:10.0.xx.xx Mask:255.255.255.0
inet6 addr: fe80::xxxx:xxff:fexx:xxxx/64 Scope:Link
UP BROADCAST RUNNING MULTICAST MTU:1500 Metric:1
RX packets:4565 errors:0 dropped:39 overruns:0 frame:0
TX packets:6174 errors:0 dropped:0 overruns:0 carrier:0
collisions:0 txqueuelen:1000
RX bytes:662376 (646.8 KiB) TX bytes:925271 (903.5 KiB)
lo Link encap:Local Loopback
inet addr:127.0.0.1 Mask:255.0.0.0
inet6 addr: ::1/128 Scope:Host
UP LOOPBACK RUNNING MTU:16436 Metric:1
RX packets:307 errors:0 dropped:0 overruns:0 frame:0
TX packets:307 errors:0 dropped:0 overruns:0 carrier:0
collisions:0 txqueuelen:0
RX bytes:38234 (37.3 KiB) TX bytes:38234 (37.3 KiB)
wwan0 Link encap:Ethernet HWaddr xx:xx:xx:xx:xx:xx
inet6 addr: fe80::xxxx:xxff:fexx:xxxx/64 Scope:Link
UP BROADCAST RUNNING MULTICAST MTU:1500 Metric:1
RX packets:0 errors:0 dropped:0 overruns:0 frame:0
TX packets:26 errors:0 dropped:0 overruns:0 carrier:0
collisions:0 txqueuelen:1000
RX bytes:0 (0.0 B) TX bytes:4557 (4.4 KiB)
Now load a kernel module to enable communication with modem. Again, edit Vendor and product IDs to your values.
modprobe usbserial vendor=0x12d1 product=0x1506
This should create a new vitual serial inderfaces. List them:
root@server:~# ls /dev/ttyUSB*
/dev/ttyUSB0 /dev/ttyUSB1 /dev/ttyUSB2
My Huawei modem creates 3 interfaces but only one of them is the correct (usually the first but not always!). Only possible way to recognize it, is "trial and error" method. So open minicom and try the first interface (/dev/ttyUSB0). if you don`t have minicom, run "apt-get install minicom" first. Right setting for virtual serial interface are the same as with Nokia phone (115200 8N1, enable software and hardware flow control). Try to send AT command, it should respond with OK message
Welcome to minicom 2.6.1
OPTIONS: I18n
Compiled on Apr 28 2012, 19:24:31.
Port /dev/ttyUSB0
Press CTRL-A Z for help on special keys
AT
OK
Now when you detect the correct virtual serial interface and you can talk with baseband chip, you can install wvdial and ppp packages needed to start a data call and connect to Internet.
apt-get install wvdial ppp
Edit wvdial configuration file.
nano /etc/wvdial.conf
And insert following lines:
[Dialer Defaults]
Init1 = ATZ
Init2 = ATQ0 V1 E1 S0=0 &C1 &D2 +FCLASS=0
Modem Type = USB Modem
ISDN = 0
Stupid Mode = yes
Modem = /dev/ttyUSB0
Phone = PHONE-NUMBER
Username = USERNAME
Password = PASSWORD
Baud = 115200
To get right values in black bold, call your service provider, they will surely help you (if not, phone number is usually *99# and username/password are "internet" (initially intended for accounting but not used nowadays, this authentication methon is replaced with IMEI - unique number of SIM card used also for accounting)). Now you can run wvdial and watch it connecting...
root@server:~# wvdial
--> WvDial: Internet dialer version 1.61
--> Initializing modem.
--> Sending: ATZ
ATZ
OK
--> Sending: ATQ0 V1 E1 S0=0 &C1 &D2 +FCLASS=0
ATQ0 V1 E1 S0=0 &C1 &D2 +F
OK
--> Modem initialized.
--> Sending: ATDT*99#
--> Waiting for carrier.
ATDT*99#
CONNECT
--> Carrier detected. Starting PPP immediately.
--> Starting pppd at Tue Sep 17 15:41:13 2013
--> Pid of pppd: 4213
--> Using interface ppp0
--> local IP address 10.11.xx.xx
--> remote IP address 10.64.xx.xx
--> primary DNS address 10.168.xx.xx
--> secondary DNS address 10.168.xx.xx
Now when you have connection successfully established, open new terminal woindow and in ifconfig output you should see ppp0 interface...
root@server:~# ifconfig
eth0 Link encap:Ethernet HWaddr xx:xx:xx:xx:xx:xx
inet addr:10.0.xx.xx Bcast:10.0.xx.xx Mask:255.255.255.0
inet6 addr: fe80::xxxx:xxff:fexx:xxxx/64 Scope:Link
UP BROADCAST RUNNING MULTICAST MTU:1500 Metric:1
RX packets:4171 errors:0 dropped:36 overruns:0 frame:0
TX packets:5607 errors:0 dropped:0 overruns:0 carrier:0
collisions:0 txqueuelen:1000
RX bytes:593323 (579.4 KiB) TX bytes:853390 (833.3 KiB)
lo Link encap:Local Loopback
inet addr:127.0.0.1 Mask:255.0.0.0
inet6 addr: ::1/128 Scope:Host
UP LOOPBACK RUNNING MTU:16436 Metric:1
RX packets:300 errors:0 dropped:0 overruns:0 frame:0
TX packets:300 errors:0 dropped:0 overruns:0 carrier:0
collisions:0 txqueuelen:0
RX bytes:37171 (36.2 KiB) TX bytes:37171 (36.2 KiB)
ppp0 Link encap:Point-to-Point Protocol
inet addr:10.11.xx.xx P-t-P:10.64.xx.xx Mask:255.255.255.255
UP POINTOPOINT RUNNING NOARP MULTICAST MTU:1500 Metric:1
RX packets:7 errors:0 dropped:0 overruns:0 frame:0
TX packets:8 errors:0 dropped:0 overruns:0 carrier:0
collisions:0 txqueuelen:3
RX bytes:94 (94.0 B) TX bytes:157 (157.0 B)
wwan0 Link encap:Ethernet HWaddr xx:xx:xx:xx:xx:xx
inet6 addr: fe80::xxxx:xxff:fexx:xxxx/64 Scope:Link
UP BROADCAST RUNNING MULTICAST MTU:1500 Metric:1
RX packets:0 errors:0 dropped:0 overruns:0 frame:0
TX packets:36 errors:0 dropped:0 overruns:0 carrier:0
collisions:0 txqueuelen:1000
RX bytes:0 (0.0 B) TX bytes:5604 (5.4 KiB)
...and connected to Internet...
root@server:~# ping -c5 google.com
PING google.com (62.168.125.29) 56(84) bytes of data.
64 bytes from 62.168.125.29: icmp_req=1 ttl=58 time=57.7 ms
64 bytes from 62.168.125.29: icmp_req=2 ttl=58 time=67.2 ms
64 bytes from 62.168.125.29: icmp_req=3 ttl=58 time=58.0 ms
64 bytes from 62.168.125.29: icmp_req=4 ttl=58 time=71.1 ms
64 bytes from 62.168.125.29: icmp_req=5 ttl=58 time=51.2 ms
--- google.com ping statistics ---
5 packets transmitted, 5 received, 0% packet loss, time 6008ms
rtt min/avg/max/mdev = 51.252/61.079/71.126/7.163 ms
To end connection, return to wvdial terminal and press CTRL+C.
Problems which I observed during testing...
- devices creating new interface at connecting (thus inpossible to use scripts and so on...) - this is most often because of don`t closing serial interface. Old serial interface is quite different from USB. When you connect to some device, port is changed to the "open" state. If you force quit program communicating via serial interface it will not close this port, so if you later disconnect device, port cannot be deleted because it is still open! I have encountered this when connecting to Nokia`s baseband and when quitting minicom, unwittingly I used Q instead X. This caused exactly the same problem (simply, X means close minicom and close port, while Q means close minicom but leave port open). So every time I connected phone again, it creates ttyACM0, ttyACM1, ttyACM2... This problem can be solved by disconnection of device, removing old interfaces (rm -f /dev/ttyACM*) and connecting device again. And be careful to always close port.
- Huawei (all modem dongles in general) and enabled PIN verification - before you insert SIM card into these dongles, be sure you disabled the PIN verification on the SIM card. This can be done in every mobile. Second option is to send PIN code via AT command. When testing communication with baseband chip, right after sending "AT" command, send another "AT+CPIN=0000". Change "0000" to yours. If you sent correct PIN code, device should respond with "OK". Pin verification can be disabled also directly in Huawei, by sending third command "AT+CLCK="SC",0,"0000"". Replace last 4 zeroes with actual PIN code. You should not have to enter it ever again.
Welcome to minicom 2.6.1
OPTIONS: I18n
Compiled on Apr 28 2012, 19:24:31.
Port /dev/ttyACM0
Press CTRL-A Z for help on special keys
AT
OK
AT+CPIN=0000
OK
AT+CLCK="SC",0,"0000"
OK
Share mobile Internet connection
This Internet connection can be easily made available for whole network through Ethernet port. I will expand this topic later. If you want it now, start Google and the keywords is "IP forwarding" ;)


